RMA Portal User Guide
Step-by-step instructions for submitting monitor repair requests through the Goldfinger RMA Portal.
Quick Navigation
Jump to any section or complete required actions
Initial One-Time Setup
Complete your profile to streamline future RMA submissions
Setup Required
You need to complete your profile before creating RMA tickets. This is a one-time setup.
Video Guide: Profile Setup
Watch this short tutorial to see how to complete your user profile setup step-by-step.
What You'll Need to Provide:
Time-Saving Benefit
This information auto-populates all future RMA tickets, making submissions much faster.
RMA Process Steps
1Determine If You Need an RMATroubleshoot your issue or contact support for guidance
Troubleshoot your issue or contact support for guidance
Try These Steps First
Many issues can be resolved without sending your monitor for repair. Try our troubleshooting guide or contact support to determine the best course of action.
Self-Troubleshooting
Check our comprehensive troubleshooting guide for common issues and solutions.
View Troubleshooting GuideContact Support
Not sure if you need an RMA? Our support team can help diagnose your issue.
Get Support HelpQuick Check: Common Issues
Still not working? If basic troubleshooting doesn't resolve the issue, you likely need to submit an RMA ticket.
Ready to Proceed?
If troubleshooting didn't resolve your issue, or if you have physical damage, you can proceed directly to create an RMA ticket. Our system will automatically route your request to the appropriate repair facility.
2Create & Complete Your RMA Ticket (Guided Wizard)
Once you've determined an RMA is needed, log into the portal and click Create RMA Ticket. The system will launch a guided, multi-step wizard to build your submission.
Complete Walkthrough: Creating an RMA Ticket
Watch this comprehensive guide that walks through each step of creating an RMA ticket from start to finish.
Step 1: Welcome
An introductory screen explains the RMA process. Click Begin to start.
Step 2: Shipping Information
This screen displays your default "Shipped From" and "Return To" addresses, pre-filled from your User Profile.
- To Edit Addresses: Click the pencil icon in the top-right corner to open a drawer and override the addresses for this specific shipment.
- Select Repair Location: Choose where you want your monitors repaired. You can select between our repair facilities (Johns Island, SC or Henderson, NV) or request on-site service if available.
- Once all information is confirmed, click Continue.
Note: The repair location you select determines where your monitors will be processed and may affect repair timing and shipping logistics.
Step 3: Add Monitors & Items
On this screen, you will add each monitor requiring service. You can also order items (such as replacement AD or backlight boards) to include on the same ticket.
- Click the Add a Monitor button.
- A detailed form will appear. Please fill out all relevant fields:
- Model Number
- Serial Number: Located on the sticker on the rear of the monitor, explicitly labeled "Serial No:".

Example: Monitor rear showing sticker location

Close-up: Serial number sticker detail
- Issues: Select all applicable issues from the checklist.
- Attachments: Upload clear photos of the issue and the monitor's serial number sticker.
- Click Save Monitor. The monitor will now appear as a card on the screen.
- Repeat this process for every monitor you intend to ship.
- When all monitors have been added, click Continue.
Ordering Items (AD & Backlight Boards)
Need a replacement part? Click Add an Item to choose from our available items. Each item shows a photo, price, and quantity so you can order exactly what you need.
- Location-specific items: Some items are only stocked at a particular repair center. Selecting one will automatically set — and lock — your repair location to the correct facility so your order ships to the right place.
- Return credit: For boards eligible for return credit, you'll see a note like “return your old board for a $X credit.” Send your faulty board back to the repair center and the credit is applied to your invoice — we refurbish and reuse it.
Tip: Because a ticket ships to a single location, all location-restricted items on one ticket must share the same facility. If you need parts from different centers, create a separate ticket for each.
Step 4: Review Your RMA Ticket
A final summary screen displays all shipping information and a complete list of the monitors and items you have added. Please review all details carefully. You can use the Back button to make changes. Once you have verified that all information is correct, click Submit RMA Ticket.
3Configure Notifications
The final screen allows you to configure who receives email updates for this ticket.
- Your account's email address is automatically included.
- You may add the email addresses of any colleagues who also need to be kept informed.
Click Send Notifications to finalize the process. If you prefer, you may select Skip.
Upon completion, your ticket is officially submitted, and a unique RMA Number is generated and assigned.
Post-Submission: Shipping and Communication
Shipping Your Equipment
When preparing your shipment, please adhere to the following:
- Clearly write the assigned RMA Number on the outside of the box.
- Ship equipment to the exact facility address provided by theRMA Manager in Step 1.
- Ensure monitors are packed securely with adequate padding (at least 2 inches on all sides).
- Include any associated power supplies or remote controls if relevant to the issue.
Shipping Requirements
RMA # Required
Write RMA number clearly on the outside of the shipping box
Secure Padding
Use at least 2 inches of padding on all sides
Original Box
Use original packaging when available for best protection
Tracking and Communication
Monitor the lifecycle of your ticket in the portal's Dashboard.
- View all your tickets and their real-time status
- Click the conversation button to access the message panel directly from any ticket
- Send messages directly to technicians assigned to your ticket
- Receive automated email updates for status changes
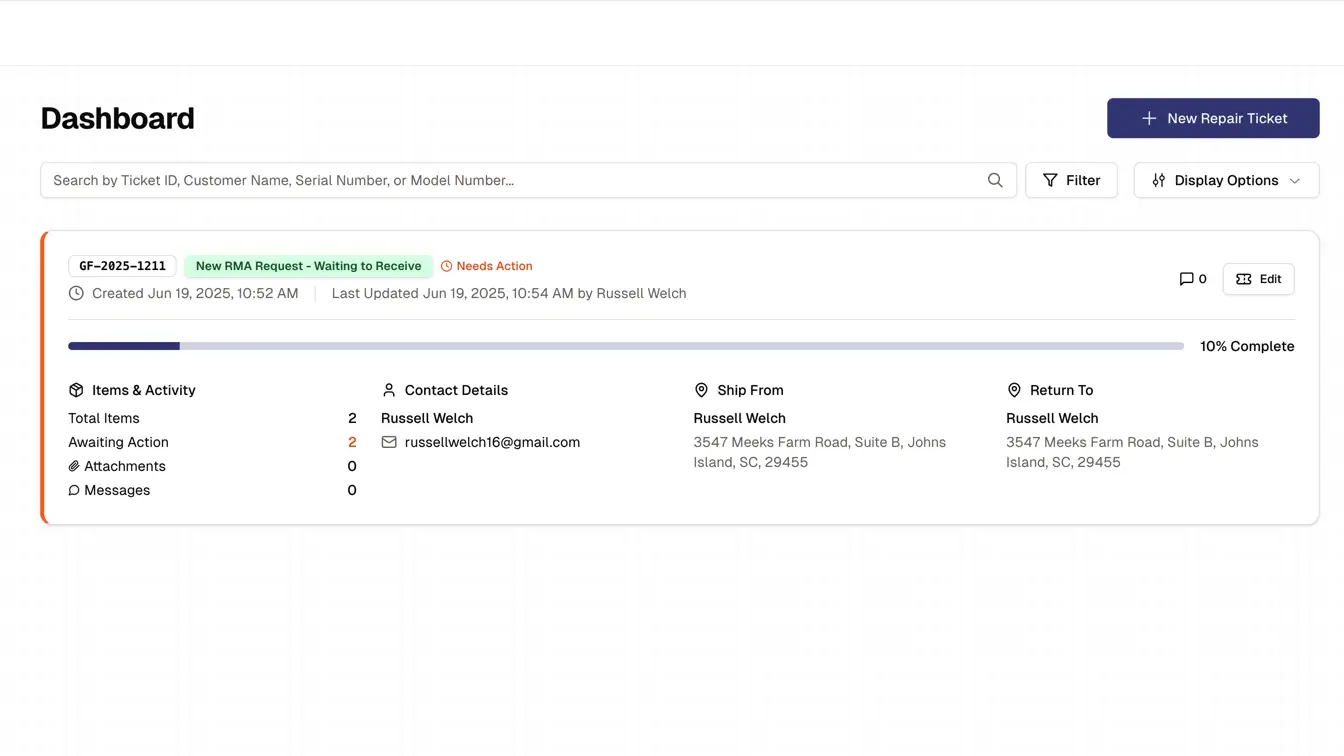
Screenshot: The main dashboard showing ticket status, conversation panel, and communication features
Frequently Asked Questions
Support & Assistance
Contact us during office hours for help with the RMA process